Sooner or later, Outlook users are faced with the question of how to export Outlook mail and contacts or how to import Outlook messages from another e-mail program. Below we will look at the different methods of exporting and importing.
Table of contents
- How to export outlook contacts and messages
- Important considerations
- Importing
- Merging from a .pst source
- Other options
Sometimes, you may need your message history to move between your computers and devices. Today, when there is an abundance of smart gadgets, and we replace those quite often. It is important to ensure that wherever you go, your emails and contacts will be accessible. Probably the most widely used correspondence software today, especially in business settings, is Outlook email online. In cases when you have no technical support to contact, awareness of the basic Outlook export procedure will save you time and prevent data loss. There are several possible reasons warranting export Outlook messages from your inbox.
Note: If you looking for the solution to import .mbox or .mbx mailbox files to Outlook, please read this article instead.
- Switching email services or apps;
- Upgrading to a new device;
- A need for a printed collection of emails;
- The need to prevent important information from getting lost in case of system crashes or virus attacks.
The procedure may sound daunting, but it is simple to perform. If you have been searching “outlook export contacts“, you have come to the right place. Read on for a comprehensive guide. The steps listed below are applicable to 2010, 2013, 2016 and Mac versions.

How to export outlook contacts and messages
Once the operation is over, it is possible to either save the generated file to a hard drive or do a backup involving another app. The exact sequence of steps depends on what you intend to do, as well as the software version in use. In Windows, you will be exporting to an outlook .pst file. This will contain all your messages along with the address book, signatures and other features – you may export outlook calendar with all the appointments, as well as tasks and notes. Upon generation of the file, it may be backed up and transferred to a different PC or another device, as well as an operating system or software version.
- Open Outlook;
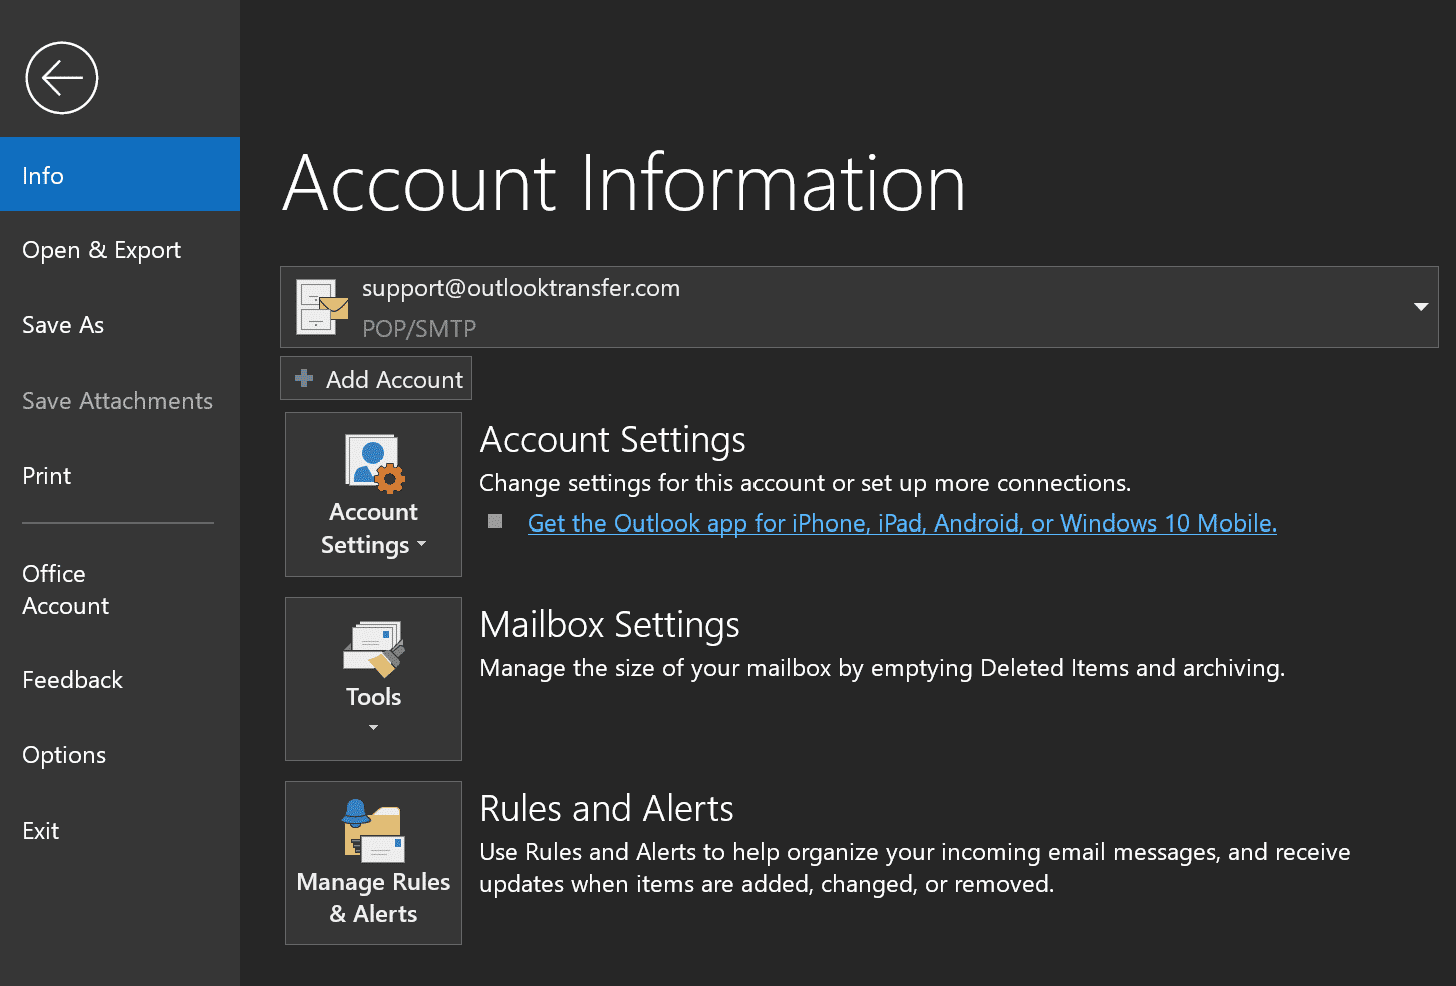
- Click on the tab named “File”, where you can work with settings;
- In “Account Settings”, select the option that has the same name;
- Head over to the tab named either “Data” or “Data Files”;
- Find the name of the file/account;
- Choose “Open Folder Location” (“Open File Location”);
- In order to backup outlook emails, do the following. Copy the .pst file to a certain PC location of your choice or any kind of portable media (e.g., a memory stick).
This procedure applies to Microsoft outlook personal mail. On Mac, a similar procedure (“Tools” tab – “Export” – “Export to Archive File” – “Mail” – “Continue” – “Save as” – “Finish”) will generate a file with the .olm extension. Just like .pst, it contains your emails together with contacts and calendar.

Important considerations
Please note that the .pst you save on your computer or other media may only be opened using Outlook personal. If the generated file includes any information that is sensitive (either in text or attachments), make sure it is protected in compliance with your corporate requirements for data protection. In addition, avoid storing .pst and connecting to it if its location is a network drive.
The best method to export data from Outlook
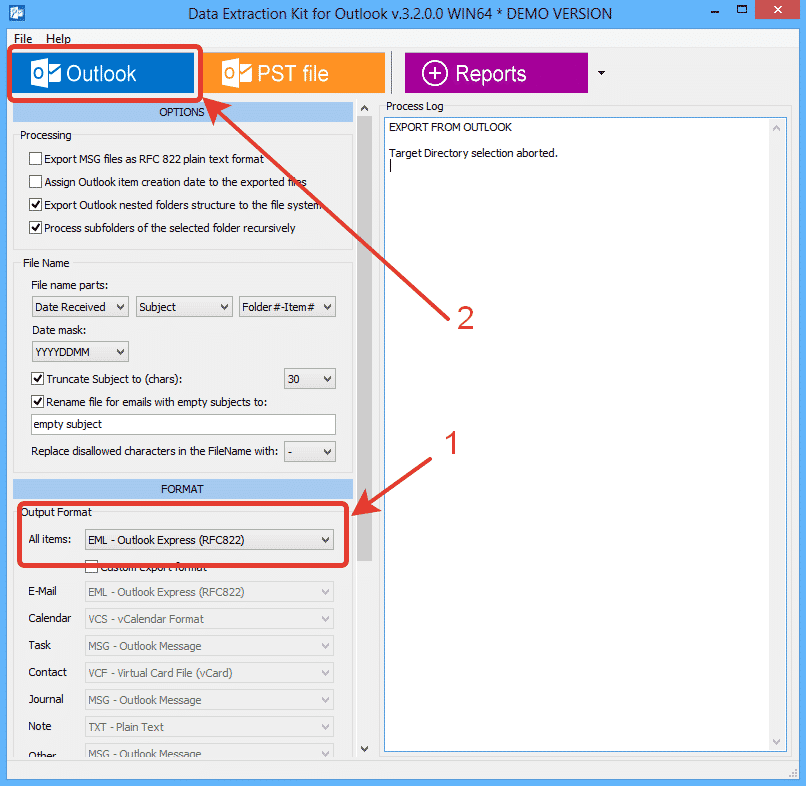
The best option is to use the automatic method for exporting without the chance of losing some data. From address book contacts to email messages, as well as calendar appointments and notes, – any type of data from Outlook can be exported using the Data Extraction Kit software. Read how to use it.
* - The unregistered version converts a limited number of messagesImporting
Once you import a .pst file, you will see the items integrated into your existing Mailbox (or list of account folders). If you need guidance in terms of steps to create new outlook account, it may be easily located on the Microsoft website under the heading “Create Outlook Account“. Alternatively, you may want to transfer the data as a separate list of folders. Here is how it is done in different versions of the Microsoft Outlook.
In Outlook 2013-2016
- Go to menu “File”;
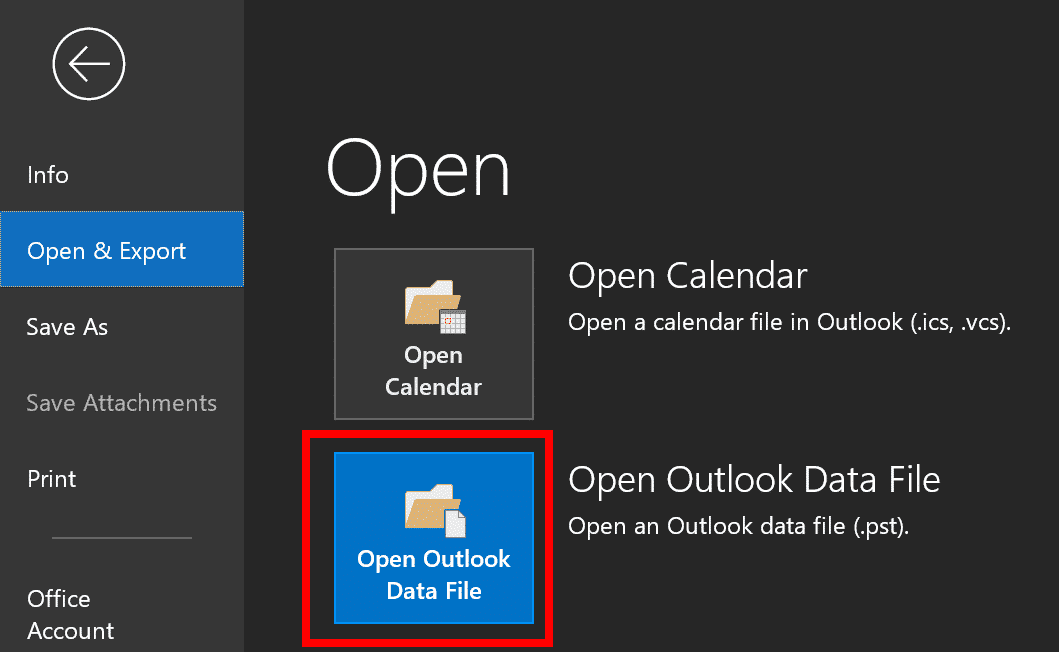
- Click “Open & Export” menu item;
- Click “Open Outlook Data File” button;
- Specify the *.pst file name to open and click “Open” button.
However, in the 2010 program, there is more to do
- Go to menu “File” then click “Account Settings” button;
- Click “Account Settings” in the appeared drop-down menu;
- In the Account Settings window go to “Data Files” tab and click “Add…” button;
- Identify the *.PST file to open and select it;
- Click “Open” (or “OK”). Now, the data file can be seen listed in “Account Settings”, which you may now close.
In the end, you should see the data file items featured in the navigation panel on the left. The operation is complete!

Merging from a .pst source
- Go to the “File” tab (upper left);
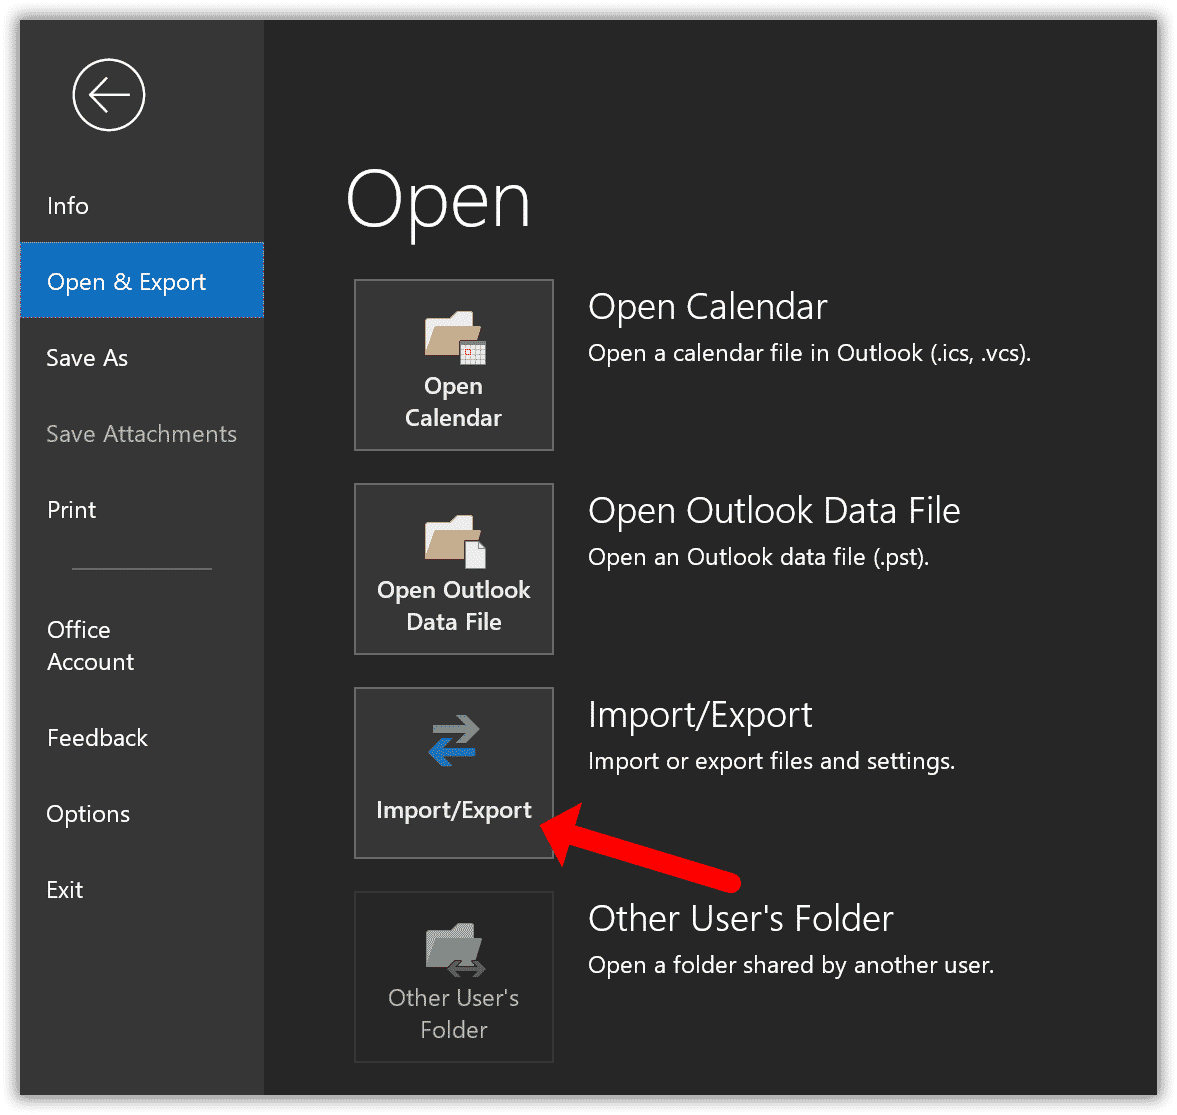
- Click “Open & Export” menu item;
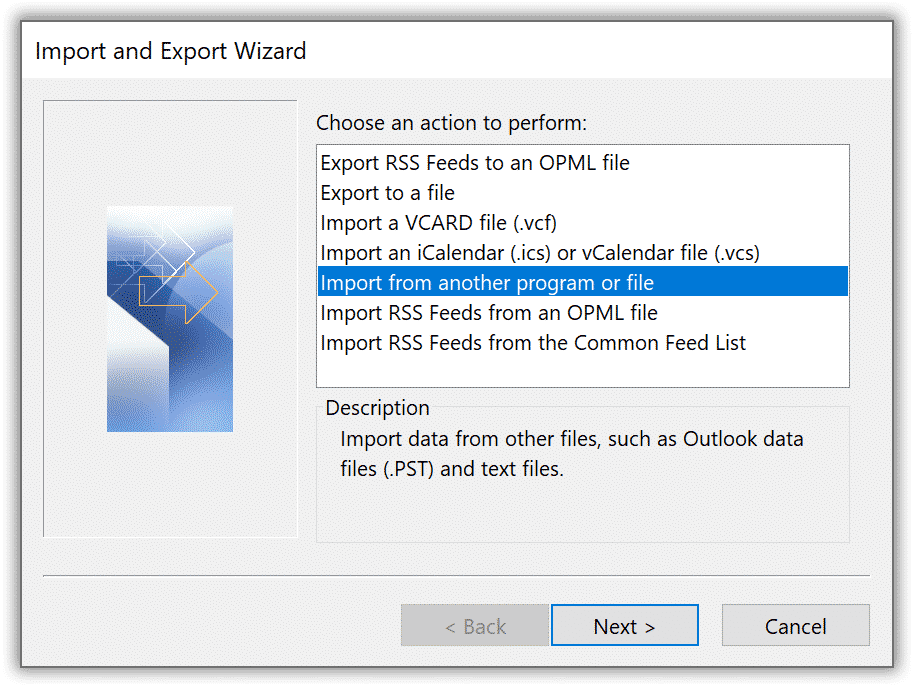
- “Import/Export” (“Open” – “Import” for 2010), which opens the wizard;
- Select “Import from another program or file” action in the list of actions to perform;
- Then click “Outlook Data File”. You may have to do some scrolling to locate the “Next” button;
- If the backup file is found in its default location, you will see it under “File to import”. Otherwise, you will need to browse to select it.
Importantly, these three options allow choosing actions for certain duplicate items (e.g., tasks, appointments, or emails). If you cannot decide what to do, stick to “Allow duplicates”.

Make sure that your address (or name) is specified as the merging location. It must be selected in the bottom half of the wizard. Once you click “Finish”, all the required contents will be integrated into identical folders of your new mailing account.
Additional information:
- How to import EML files to Outlook
- Exporting Thunderbird emails to Outlook
- Guide to export Exchange mailbox to PST file
Other options
You may also import to a Gmail account. This gives you an extra backup source, as well as the chance to access data from any connected device. In this case, go to your Outlook desktop and add the google mail account. Next, copy the necessary folders and paste them.
Finally, you could use Excel. Here, what is generated is a spreadsheet with certain corresponding columns (e.g., Subject, Body, etc.). From a Mac computer, you may easily copy your contacts to a CSV file.
