Migrating emails from Outlook to Thunderbird can seem like a daunting task, but with the right tools and guidance, it can be a smooth process. Let’s get together and walk through the steps to make this transition seamless. I recently decided to make this switch, and here’s my experience using the Data Extraction Kit for Outlook software to export emails from Outlook into Thunderbird.
Why I Decided to Migrate from Outlook to Thunderbird

So if I wanted to take full advantage of these features, I would have to migrate my email. If you are also interested in migrating your e-mail, you can read the comparison between Outlook and Thunderbird here.
How to Export Emails from Outlook Using Data Extraction Kit
Let me walk you through the process I followed to export emails from Outlook using the “Data Extraction Kit for Outlook” software. This tool is incredibly user-friendly and made the whole migration process much easier. It supports every classic version of Outlook, which was good for me because I use 2019 version at work.
The Data Extraction Kit made what I thought would be a tedious task incredibly simple. If you ever need to move your emails, this tool is worth a shot. So what you need to do?
Step 1: Install and Launch Data Extraction Kit for Outlook
First of all, you’ll need to download the Data Extraction Kit for Outlook from the official website. After installing it, you will need to run the software. It offers both 32-bit and 64-bit executables, and you should run one of them. But which one is the right one?
The answer is simple – you should use the program of the same architecture as your Outlook. In other words, you should run the 64-bit version of Data Extraction Kit if your Outlook is 64-bit, and so on.
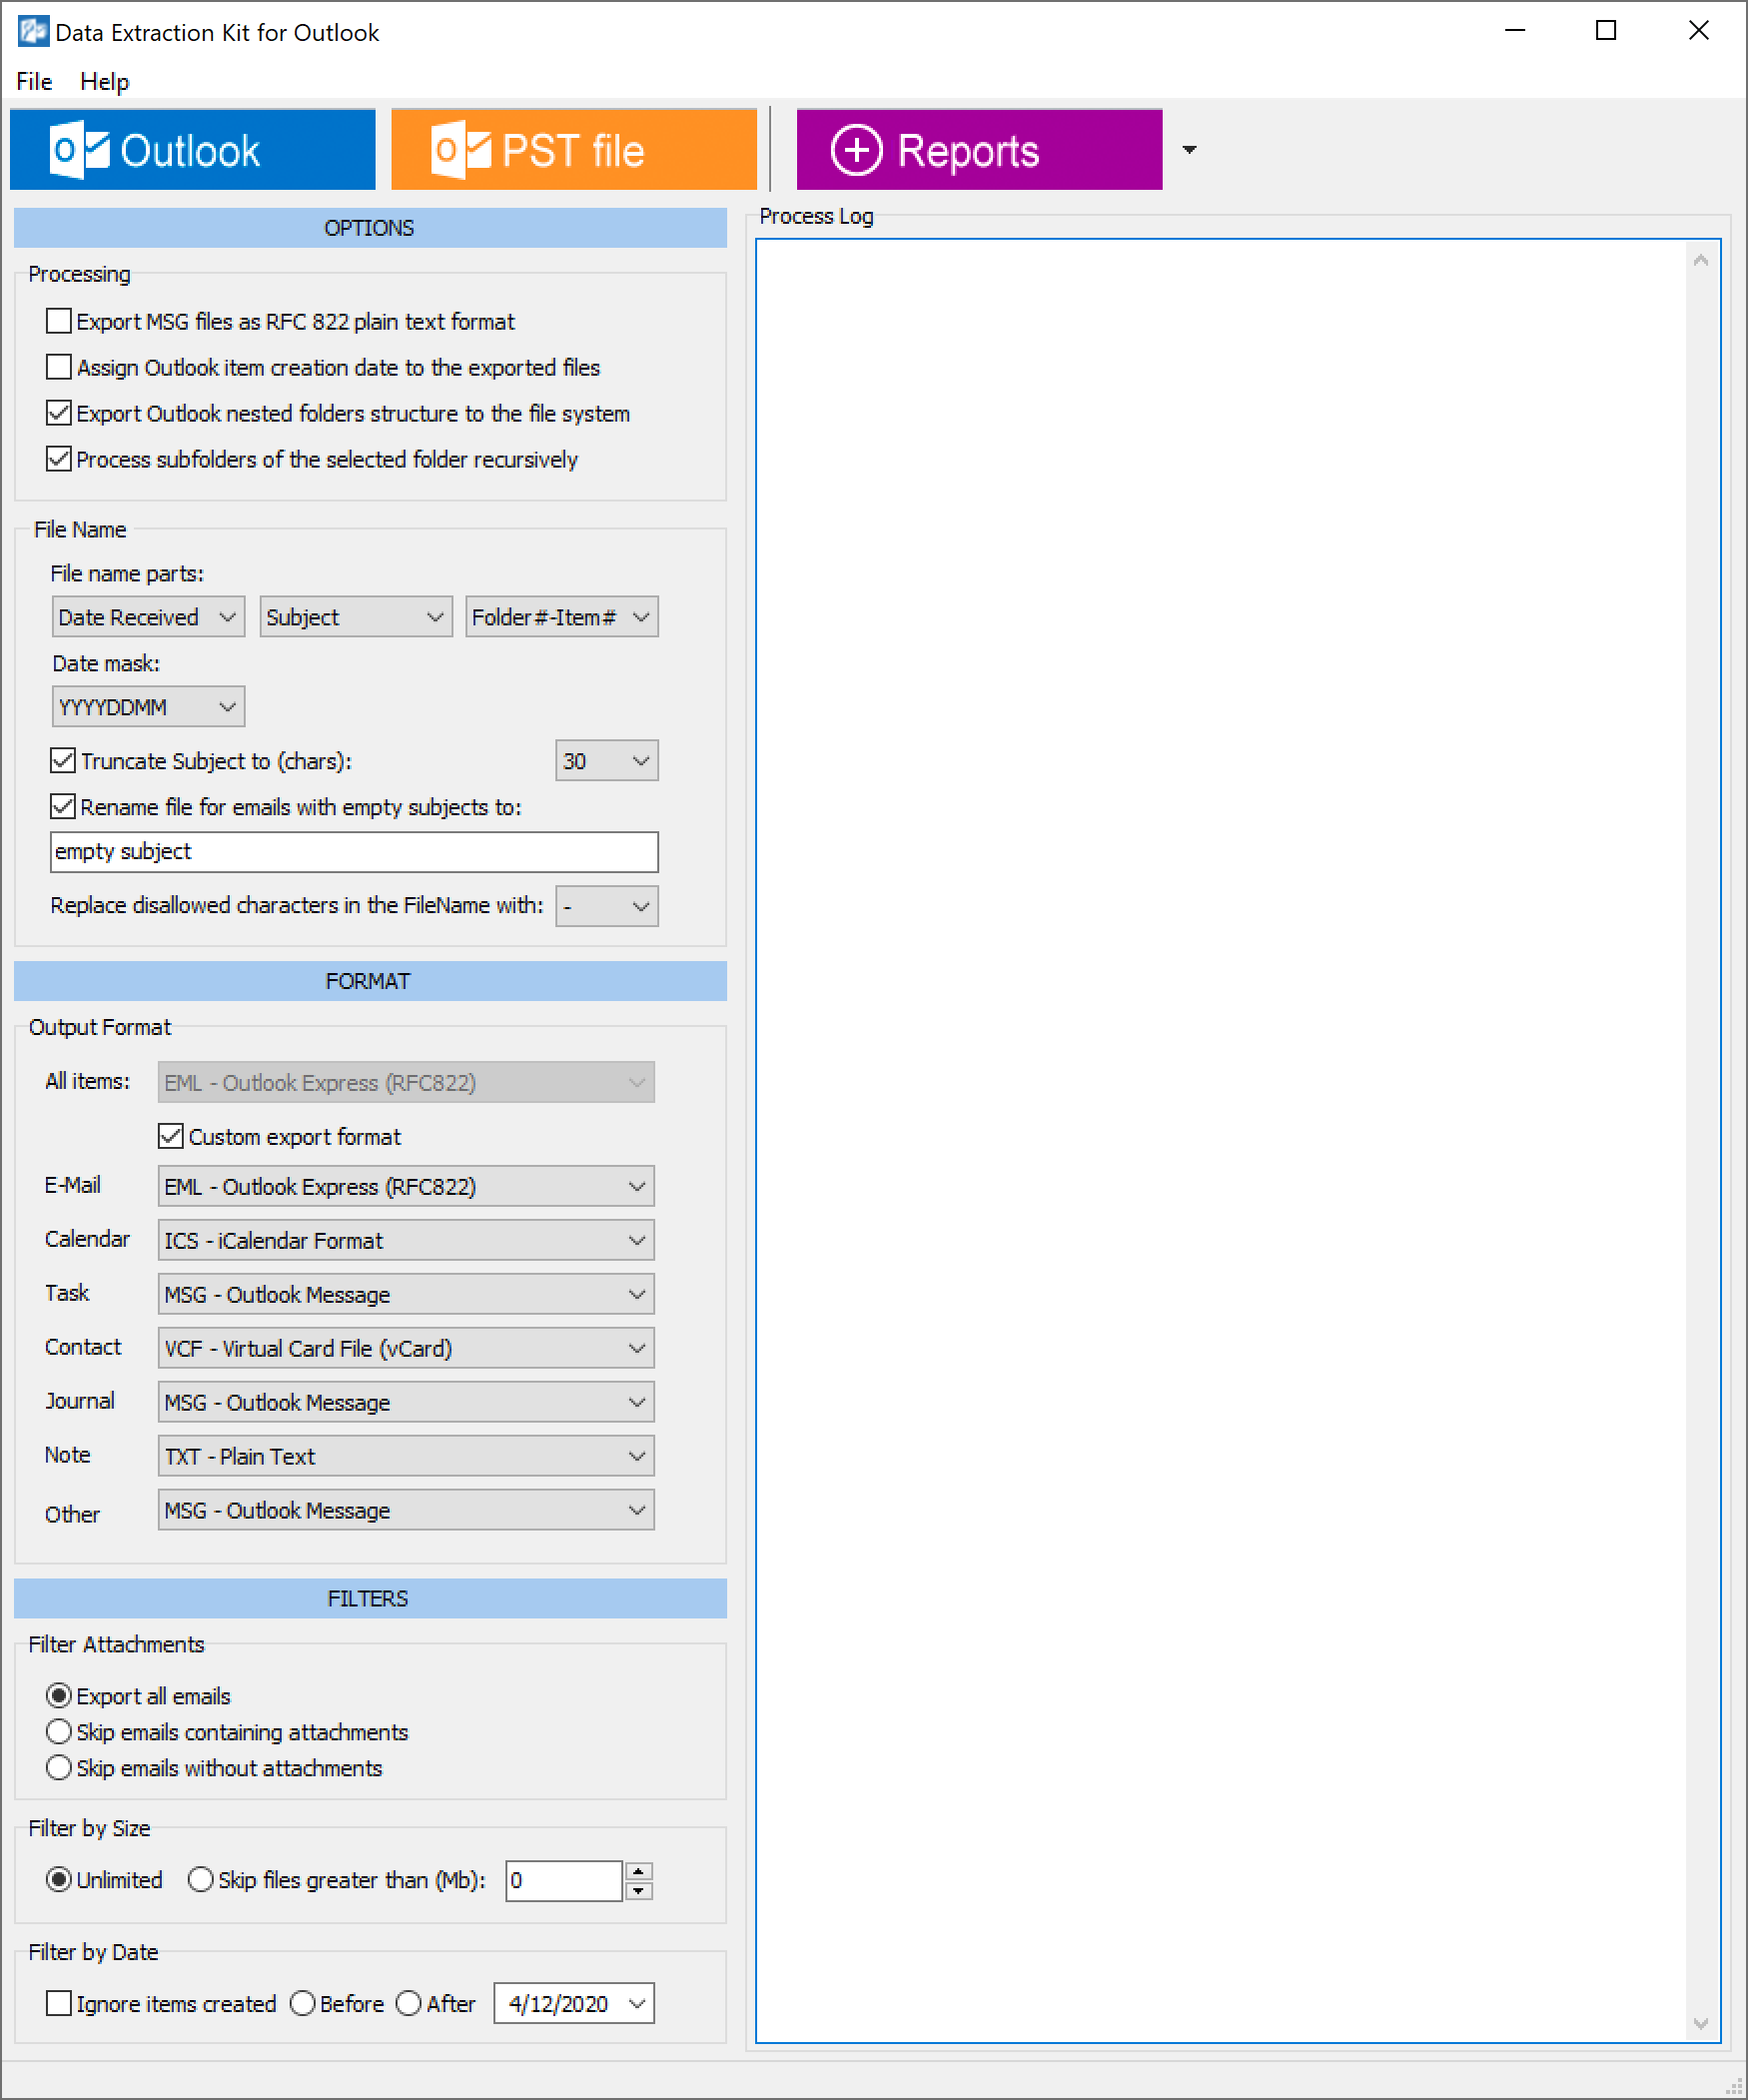
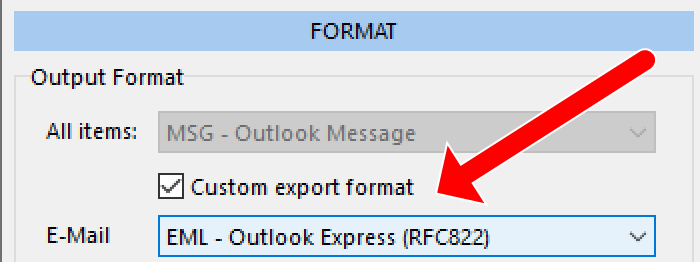
Step 3: Choose the EML Format
Chose the EML format as the export option for emails. The EML format is widely supported and perfect for importing into Thunderbird.
Step 2: Select the Outlook Profile or PST File
Next, select the select the source i.e. Outlook profile or PST file from which you want to export emails. The software allows you to select both options, making it flexible for different scenarios. To do so, simply click the ‘Outlook’ button if you want to export emails from the Outlook profile or click the ‘PST File’ button if you want to extract emails from the PST file(s).

Step 4: Specify the Destination Folder
Now you have to specify the destination folder where the exported EML files will be saved. It’s important to choose a location that will be easily accessible later when we import these files into Thunderbird. It is better to create a new empty folder for this purpose.
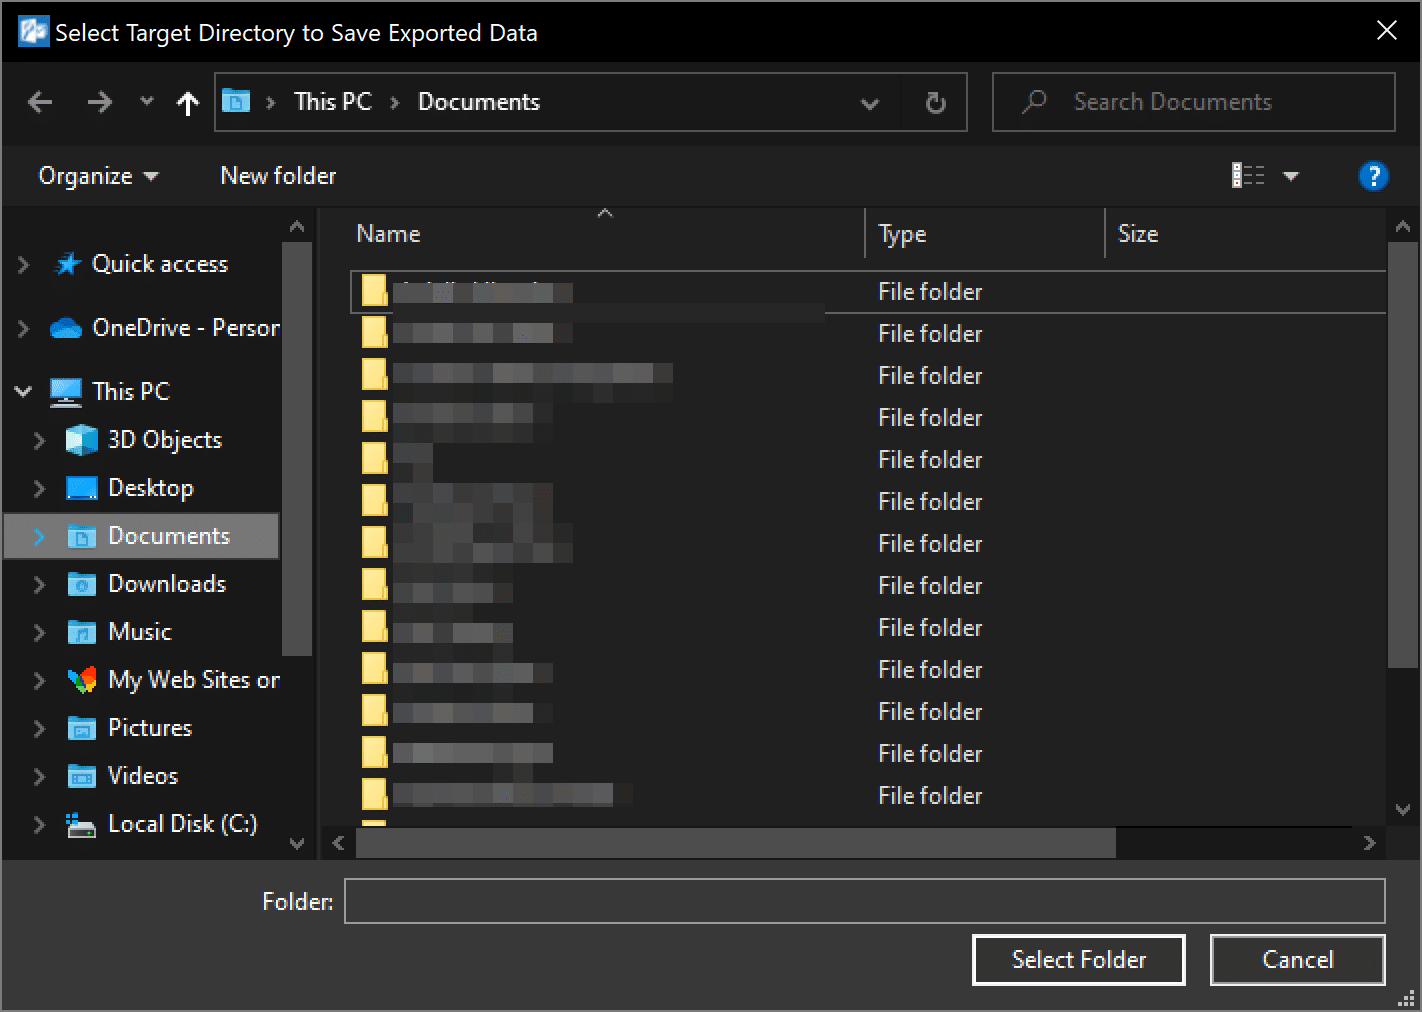
Step 5: Start the Export Process
Once everything is set up, click the “Select Folder” button to start the export process. The software will ask you to select a source Outlook folder to retrieve emails from. You can select the top one to process export of all emails or choose one you need, for example, Inbox. Data Extraction Kit will quickly process the emails and save them as EML files in the specified folder.
In my case, all my emails, including attachments, were neatly saved with just a few clicks. I hope yours are, too. What’s cool is that it preserved the original folder structure, so I didn’t have to reorganize everything from scratch. But what really stood out was the forensic reporting feature. I didn’t think everyone need it, but it came in handy for creating detailed reports of my email data. And there’s even a password recovery option, which is useful if I forget my Outlook credentials.
Importing EML Files into Thunderbird
Now that we have exported our emails as EML files, the next step is to import them into Thunderbird. Initially, the easiest way to do this seemed to be to select the emails and drag and drop them into Outlook. However, when I tried this, I found that it was not consistently effective for all emails.
Further investigation revealed that Thunderbird only accepted the first 100 email files, ignoring any additional EML files. In such cases, a practical solution is to select and drag the EML files in smaller batches until all are successfully imported. So, if you have a small number of EML files to import, do the following:
Step 1: Open Thunderbird and Create a New Folder
Open Thunderbird and create a new folder where the imported emails would be stored. This helps keep things organized and easy to manage.
Step 2: Drag and Drop EML Files
Next, navigate to the folder where the EML files were saved. Selected up to 100 EML files and simply drag and drop them into the new folder in Thunderbird. Then repeat the same for other EML files in your collection. This method ensures that all emails are transferred correctly.

Step 3: Verify the Imported Emails
After importing, verify that all emails have been successfully transferred by checking the new folder in Thunderbird. Everything should be in place, the number of emails in the Thunderbird folder should match the number of EML files you have. Check that the emails are intact with their original formatting and attachments.
This method is efficient for importing a modest number of emails into a single Thunderbird folder. But what happens when you’re faced with importing a large number of EML files? As I said at the beginning, Thunderbird offers some useful add-ons, and this was one of the things that made me switch to Thunderbird.
One of such addons is called “ImportExportTools NG” and it greatly simplifies the email migration process. Whether you’re moving a handful of emails or thousands, ImportExportTools NG makes the transition from Outlook to Thunderbird smoother and more manageable.
Importing EML Files to Thunderbird Using ImportExportTools NG
Once we have our huge collection of emails exported from Outlook as EML files, the next step is to import them into Thunderbird. Let me share how I did it using the Thunderbird add-on called ImportExportTools NG.
Step 1: Install ImportExportTools NG Add-On
First, let’s get together to install the ImportExportTools NG add-on in Thunderbird. Follow these steps:
- Launch Thunderbird on your computer.
- Click on the menu button (three horizontal lines) in the top right corner and select “Add-ons and Themes”.
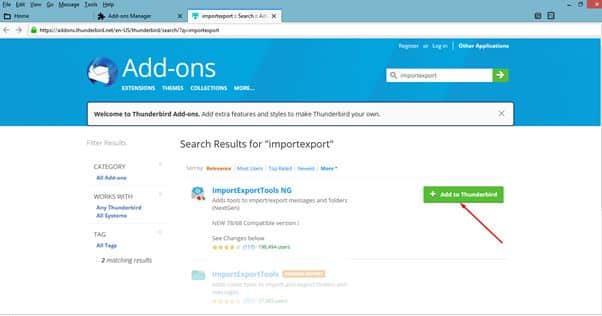
- In the Add-ons Manager, type “ImportExportTools NG” in the search bar and press Enter.
- Find the ImportExportTools NG add-on in the search results and click the “Add to Thunderbird” button. Confirm any prompts to complete the installation.
Step 2: Restart Thunderbird
After the add-on is installed, Thunderbird will prompt you to restart the application. Go ahead and restart Thunderbird to enable the ImportExportTools NG add-on.
Step 3: Create a New Folder for Imported Emails
Next, let’s organize our imported emails by creating a new folder:
- Create a New Folder. Right-click on the desired email account or Local Folders, select “New Folder”, and give it a name, such as “Imported Emails”.
- Open the New Folder. Click on the newly created folder to open it.
Step 4: Import EML Files
Now comes the exciting part—importing our EML files into Thunderbird:
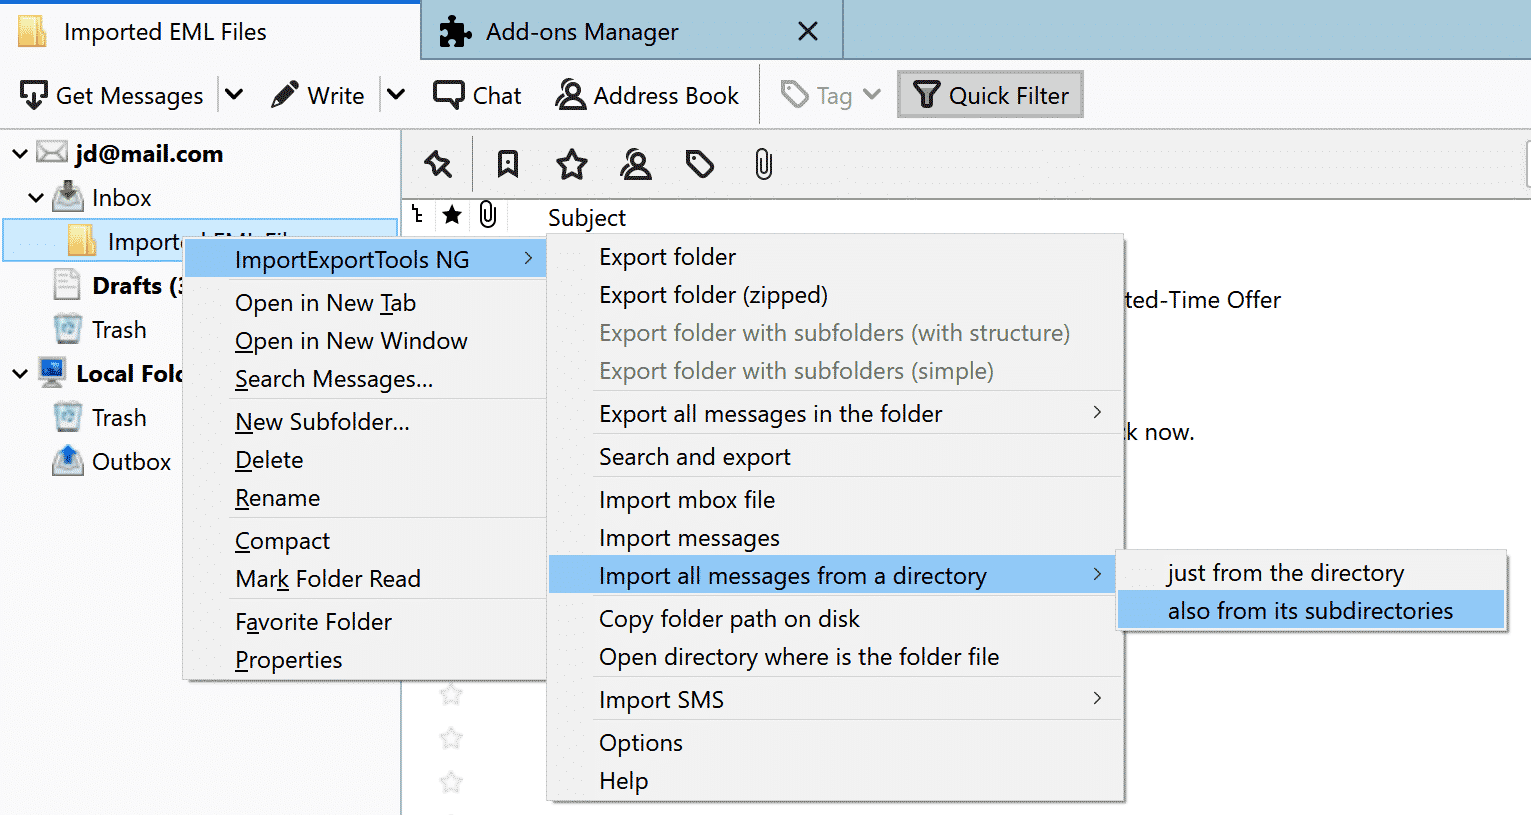
- Right-Click the Folder. Right-click on the “Imported Emails” folder (or the folder you created) and hover over “ImportExportTools NG”.
- Choose Import Option. Select “Import all messages from a directory” and then choose “just from the directory” if your EML files are in a single folder. If they are in multiple subfolders, choose “Also from its subdirectories”.
- Select EML Files Folder. A file explorer window will open. Navigate to the folder where your EML files are saved and select it.
- Start Importing. Click “Select Folder” to start the import process. The add-on will import all EML files into the selected Thunderbird folder.
Step 5: Verify Imported Emails
Finally, let’s verify that all emails have been successfully imported:
- Check the Folder. Open the “Imported Emails” folder in Thunderbird and ensure that all your emails are there.
- Review Content. Verify that the emails are intact, including attachments and original formatting.
Using the ImportExportTools NG add-on in Thunderbird made importing EML files a breeze. This add-on is a powerful tool for anyone looking to transfer their emails to Thunderbird efficiently. By following these steps, you can ensure a smooth migration process and keep all your important emails organized.
Troubleshooting Tips
If you encounter any issues during the migration process, here are some troubleshooting tips based on my experience:
- Ensure Correct File Format. Make sure that you export emails in the EML format, as it is compatible with Thunderbird.
- Check for Software Updates. Ensure that both Outlook and Thunderbird are updated to the latest versions to avoid compatibility issues.
- Make sure you have the correct version of Outlook installed. Verify that you are using the standalone (classic) version of Outlook. It’s important to note that the online version of Outlook is incompatible because it functions within a server environment and does not allow exporting emails in any form.
- Verify Email Integrity. After importing, verify that all emails are transferred correctly. If any emails are missing, re-import the affected files.
Benefits of Using Data Extraction Kit for Outlook
Using the “Data Extraction Kit for Outlook” software offered several benefits:
- User-Friendly Interface: The software’s intuitive design made the process straightforward and hassle-free.
- Flexibility: It supports both Outlook profiles and PST files, providing flexibility for different migration scenarios.
- Efficiency: The export process was quick and maintained the integrity of the emails, including attachments and formatting.
Read also how to move Outlook Calendar to Thunderbird
Conclusion
Migrating emails from Outlook to Thunderbird doesn’t have to be complicated. With the right tools and a clear plan, you can make the transition smoothly. My experience with the “Data Extraction Kit for Outlook” software was positive, and it made the migration process efficient and stress-free. If you’re considering making the switch, I highly recommend giving this method a try.
I hope that I have managed to cover all aspects of migrating from Outlook to Thunderbird and that you will be able to do the same. If you encounter any problems during your mail migration, I invite you to discuss them in the comments. I will be happy to answer your questions here or via the official support channel. Happy emailing!